

Disclaimer: The information and procedures provided in this article are for provided by a third party for educational purposes and are intended exclusively for OFF-HIGHWAY, OFF-ROAD, and closed-course vehicles. Modifying seat frames, utilizing spacers, and altering factory mounting locations is done entirely at your own risk and is not approved for public highway use.
WE HIGHLY ADVISE AGAINST COMPLETING THIS UPGRADE
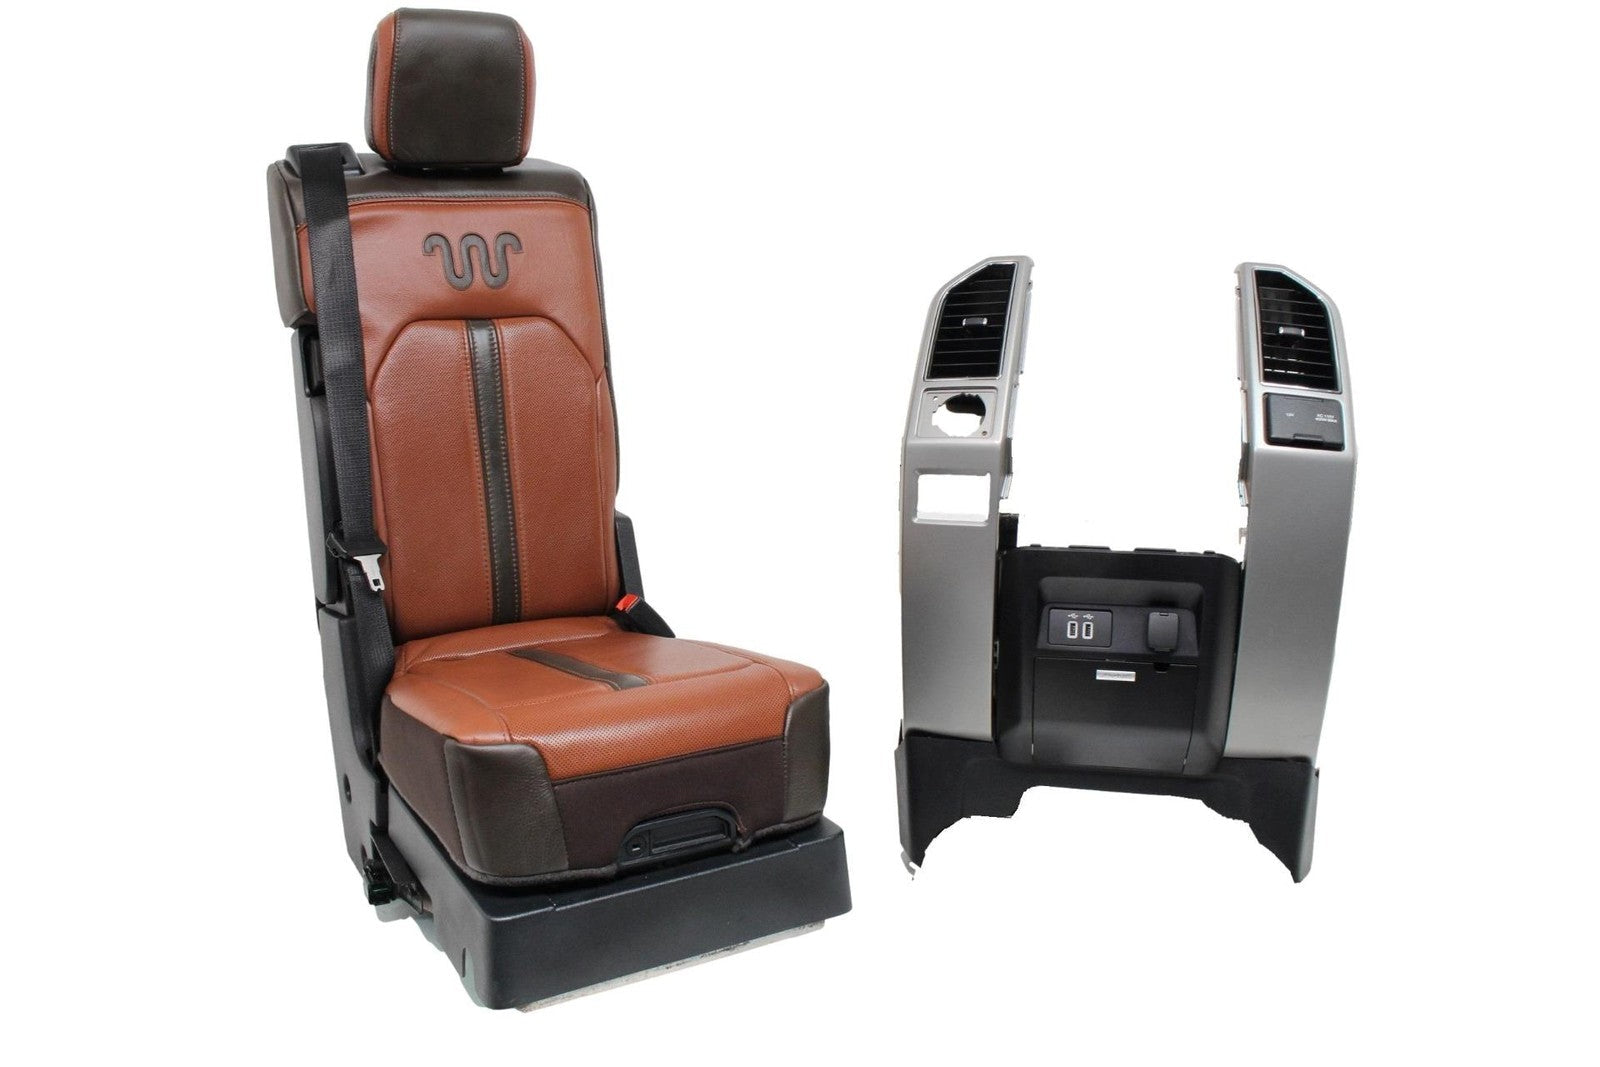
If you are looking to upgrade the interior of your 2014-2018 (or 2019 Legacy) K2-generation Chevy Silverado or GMC Sierra, swapping out the center jumpseat is one of the most functional modifications you can make. The newer 2019+ Gen 5 (T1) trucks feature an upgraded jumpseat design with vastly better storage, improved materials, and a much more modern aesthetic.
Most importantly, the T1 jumpseat integrates a modern 3-point seatbelt, offering a massive safety upgrade over the factory lap-only belt found in K2 trucks.
Here at Get New Seats, we get asked all the time if fitting this newer generation seat into an older cab requires cutting, welding, or custom fabrication. Fortunately, the geometry between the K2 and T1 jumpseats is incredibly similar. With properly sized spacers and the right hardware, this is essentially a direct bolt-in job.
Project Cost Estimate: 2014-2018 Silverado Center Seat 3-Point Shoulder Belt Upgrade
- Used 2019+ Chevy Jumpseats: ~$299-$799
- New Bolts & Spacers: ~$65-$85
- Total Estimate: $464 - $884
Check out the complete parts list and installation instructions below!
The Safety Upgrade: Eliminating the Lap Belt Hazard
Before diving into the mechanics of the swap, it is vital to understand why this upgrade is so popular. The 2014-2018 K2 platform utilized a lap-only seat belt for the center front passenger. In the event of a frontal collision, this creates a dangerous "jackknife effect," where the passenger's upper body bends sharply forward, leaving them vulnerable to striking the dashboard.
By swapping in the 2019-2026 T1 jumpseat, you are introducing a built-in, true 3-point seatbelt into the center position. You can achieve the exact same upgrade yourself for a fraction of the cost—if you use the correct hardware.
Before going further, make note that this upgrade has the folowing consequences in case of an accident on public roads:
Negligence and Personal Injury Claims
If the seat mounting fails during a collision (e.g., the bolts shear, the floorboard tears, or the seat shifts), and the passenger is injured, you could be held personally liable for negligence.
- Duty of Care: As the vehicle owner and the person who performed the installation, you have a legal duty to ensure the vehicle is safe for occupants.
- Breach of Duty: Using a seat from a different generation (T1 vs. K2) and altering the mounting points could be viewed as a "breach" of that duty because the modification was not performed according to manufacturer specifications.
- Damages: You could be responsible for the passenger's medical bills, lost wages, and "pain and suffering."
2. Insurance Policy Voids
Most insurance policies contain clauses regarding material misrepresentation or unauthorized modifications.
- Claim Denial: If an adjuster discovers that the seat was custom-mounted and contributed to an injury, the insurance company may deny the claim entirely, leaving you to pay out of pocket.
- Policy Cancellation: In extreme cases, if they deem the vehicle "inherently unsafe" due to the modification, they may cancel your coverage altogether.
3. Products Liability (The "DIY" Trap)
Normally, if a seat fails, the manufacturer (GM) is liable. However, by modifying the mounting hardware:
Assumption of Risk: You have effectively become the "manufacturer" of that mounting system. You lose the ability to sue the vehicle maker for a defect because you altered the original engineering.
For those reasons, we advise against this swap for all vehicles except off-road use only vehicles.

Here is exactly how the dimensions break down, the specific hardware you need, and the dangerous mounting mistakes you absolutely must avoid.
The Dimension Breakdown: The Tape Measure Doesn't Lie
When you put a tape measure directly to the mounting points of both seats, the math for this swap becomes incredibly clear:
- Factory K2 (Gen 4) Jumpseat: 13 1/2" Wide x 15" Front-to-Back
- Upgraded T1 (Gen 5) Jumpseat: 14 1/2" Wide x 15 1/4" Front-to-Back
Comparing those footprints reveals two very minor differences that we need to account for:
- The Side-to-Side Width: The newer T1 jumpseat is exactly 1 inch wider overall at the mounting points than the K2 footprint. To bridge this gap securely while leaving just enough wiggle room so you don't fight a tight metal-on-metal squeeze, the ideal target is a 10mm thick spacer on either side. This gives you roughly 2.5mm of installation tolerance to easily slide the seat into place.
- The Front-to-Back Alignment: There is a minuscule 1/4-inch placement difference in the forward-to-backward bolt hole spacing (15" vs 15 1/4"). You do not need a die grinder to slot the holes, but widening the holes by 2-3mm can help make the installation easier.
Installation Overview
The actual installation is a breeze once you have your Class 10.9 metric bolts and solid spacers ready to go.
- Remove your factory K2 jumpseat to expose the floor mounting locations.
- Position the new T1 jumpseat into place between your buckets.
- Insert your solid 10mm steel spacers directly between the seat frame and the mounting locations on both sides.
- Hand-thread your new Dorman 980-545 hardware through the frame, through the spacers, and into the mounts to ensure you aren't cross-threading anything.
- Torque everything down securely to factory specifications.
By taking a few minutes to source solid steel spacers and genuine Class 10.9 hardware, your modernized T1 jumpseat will be locked into your K2 cab just as securely as it was from the factory.
Safe Mounting Practices
The Right Spacers
M10 Solid Steel Spacer, 10mm Length. You need a solid metal puck with an Inner Diameter (ID) of 10.5mm (so the bolt passes through cleanly) and an Outer Diameter (OD) of 20-40mm (to provide a strong clamping surface against the bracket).
You'll likely have to buy these online unless you have a specialty hardware shop around. If you don't mind waiting for import, you'll be paying $6.40 per unit. You'll need four, so expect to spend around $40 with shipping.

The Right Bolts
Dorman 980-545. These are M10-1.50 x 50mm Class 10.9 flanged bolts. The built-in flange means you don't need separate hardened washers, and the 50mm length perfectly accommodates the necessary spacers to give you exact factory thread engagement into the floor.
At the time of writing, these list for $5.29 MSRP and readily available online through Advance Autoparts. You'll need four, so expect to spend around $25 with free home delivery or store pickup.


⚠️ A Critical Warning: Avoid Compressible Spacers & Low-Grade Hardware in Pre-Assembled "Jump Seat Safety Kits"
While researching this swap, you might run into expensive "Jump Seat Safety Kits" from other suppliers that include "hardened" rubber or polyurethane isolation bushings (often stamped with "40x10") or stacks of rear washers to act as the spacers.
Using compressible materials and under-spec hardware to mount an automotive seat is a massive safety hazard. Because the new center jumpseat houses that integrated 3-point seatbelt, it handles immense dynamic loads. When you try to torque down your mounting bolts over a rubber puck, the material squishes and deforms. You will never achieve the proper clamping force. Over time, trail vibrations will cause that rubber to compress further or tear, resulting in complete torque loss. The bolts will loosen, and your seat will start rattling and shifting around the cab.
Ford King Ranch Seats, Consoles, & Interior Fittings


Ford Super Duty Interior Upgrades
5th Gen Ford Super Duty OEM Interior Upgrade Guide (2023 & Newer)


5th Gen Ford Super Duty OEM Interior Upgrade Guide (2023 & Newer)
5th Gen Ford Super Duty OEM Interior Upgrade Guide (2023 & Newer)
4th Gen Ford Super Duty OEM Interior Upgrade Guide (2017 - 2022)


4th Gen Ford Super Duty OEM Interior Upgrade Guide (2017 - 2022)
4th Gen Ford Super Duty OEM Interior Upgrade Guide (2017 - 2022)
3rd Gen Ford Super Duty OEM Interior Upgrade Guide (2011 - 2016)


3rd Gen Ford Super Duty OEM Interior Upgrade Guide (2011 - 2016)
3rd Gen Ford Super Duty OEM Interior Upgrade Guide (2011 - 2016)
1st/2nd Gen Ford Super Duty OEM Interior Upgrade Guide (1999 - 2010)


1st/2nd Gen Ford Super Duty OEM Interior Upgrade Guide (1999 - 2010)
1st/2nd Gen Ford Super Duty OEM Interior Upgrade Guide (1999 - 2010)
Custom King Ranch Leather Center Jump Seats for Ford F150 & Super Duty


Custom King Ranch Leather Center Jump Seats for Ford F150 & Super Duty
Custom King Ranch Leather Center Jump Seats for Ford F150 & Super Duty
How To Install 3rd Gen Super Duty Seats In 1999-2010 Trucks

