
When the 2024 mid-cycle refresh introduced factory 12-way power seats to the Jeep lineup, it instantly became the most coveted interior upgrade. Whether you are driving an older rig or a base-model 2024, dropping a set of these new power seats into your Wrangler (JL) or Gladiator (JT) is physically a direct bolt-in process, as the floor pans and mounting brackets remain identical.
However, getting those seats to function without triggering dashboard airbag lights requires understanding how your specific model year communicates with its safety sensors—and dealing with a completely different floor plug. Here is the complete blueprint to power up your new seats while keeping your factory safety systems perfectly intact.
Installing 2024+ Power Seats in Older Models (2018–2023 JL & 2020–2023 JT)
Since the older JL and JT platforms were never wired for power seats, and the 2024+ models introduced updated crash safety standards, you are essentially merging two different electrical generations.
Phase 1: Wiring the Power Seats
Jeep physically changed the shape of the main floor connector for the 2024 refresh. This means you physically cannot plug a 2024 seat into a 2018–2023 floor receptacle—the connectors will not mate. Because of this, you are required to swap your original seat wiring harness over to the new seat (detailed in Phase 2) just to make the physical connection to the vehicle.
However, because your older factory harness does not feature a dedicated high-amp power feed for seat motors, the newly swapped harness will leave you with a completely dead seat. To activate the 12-way adjustment, you must bypass the factory floor plug for the power circuit and wire the motors independently using part of the 2024+ power seat harness:
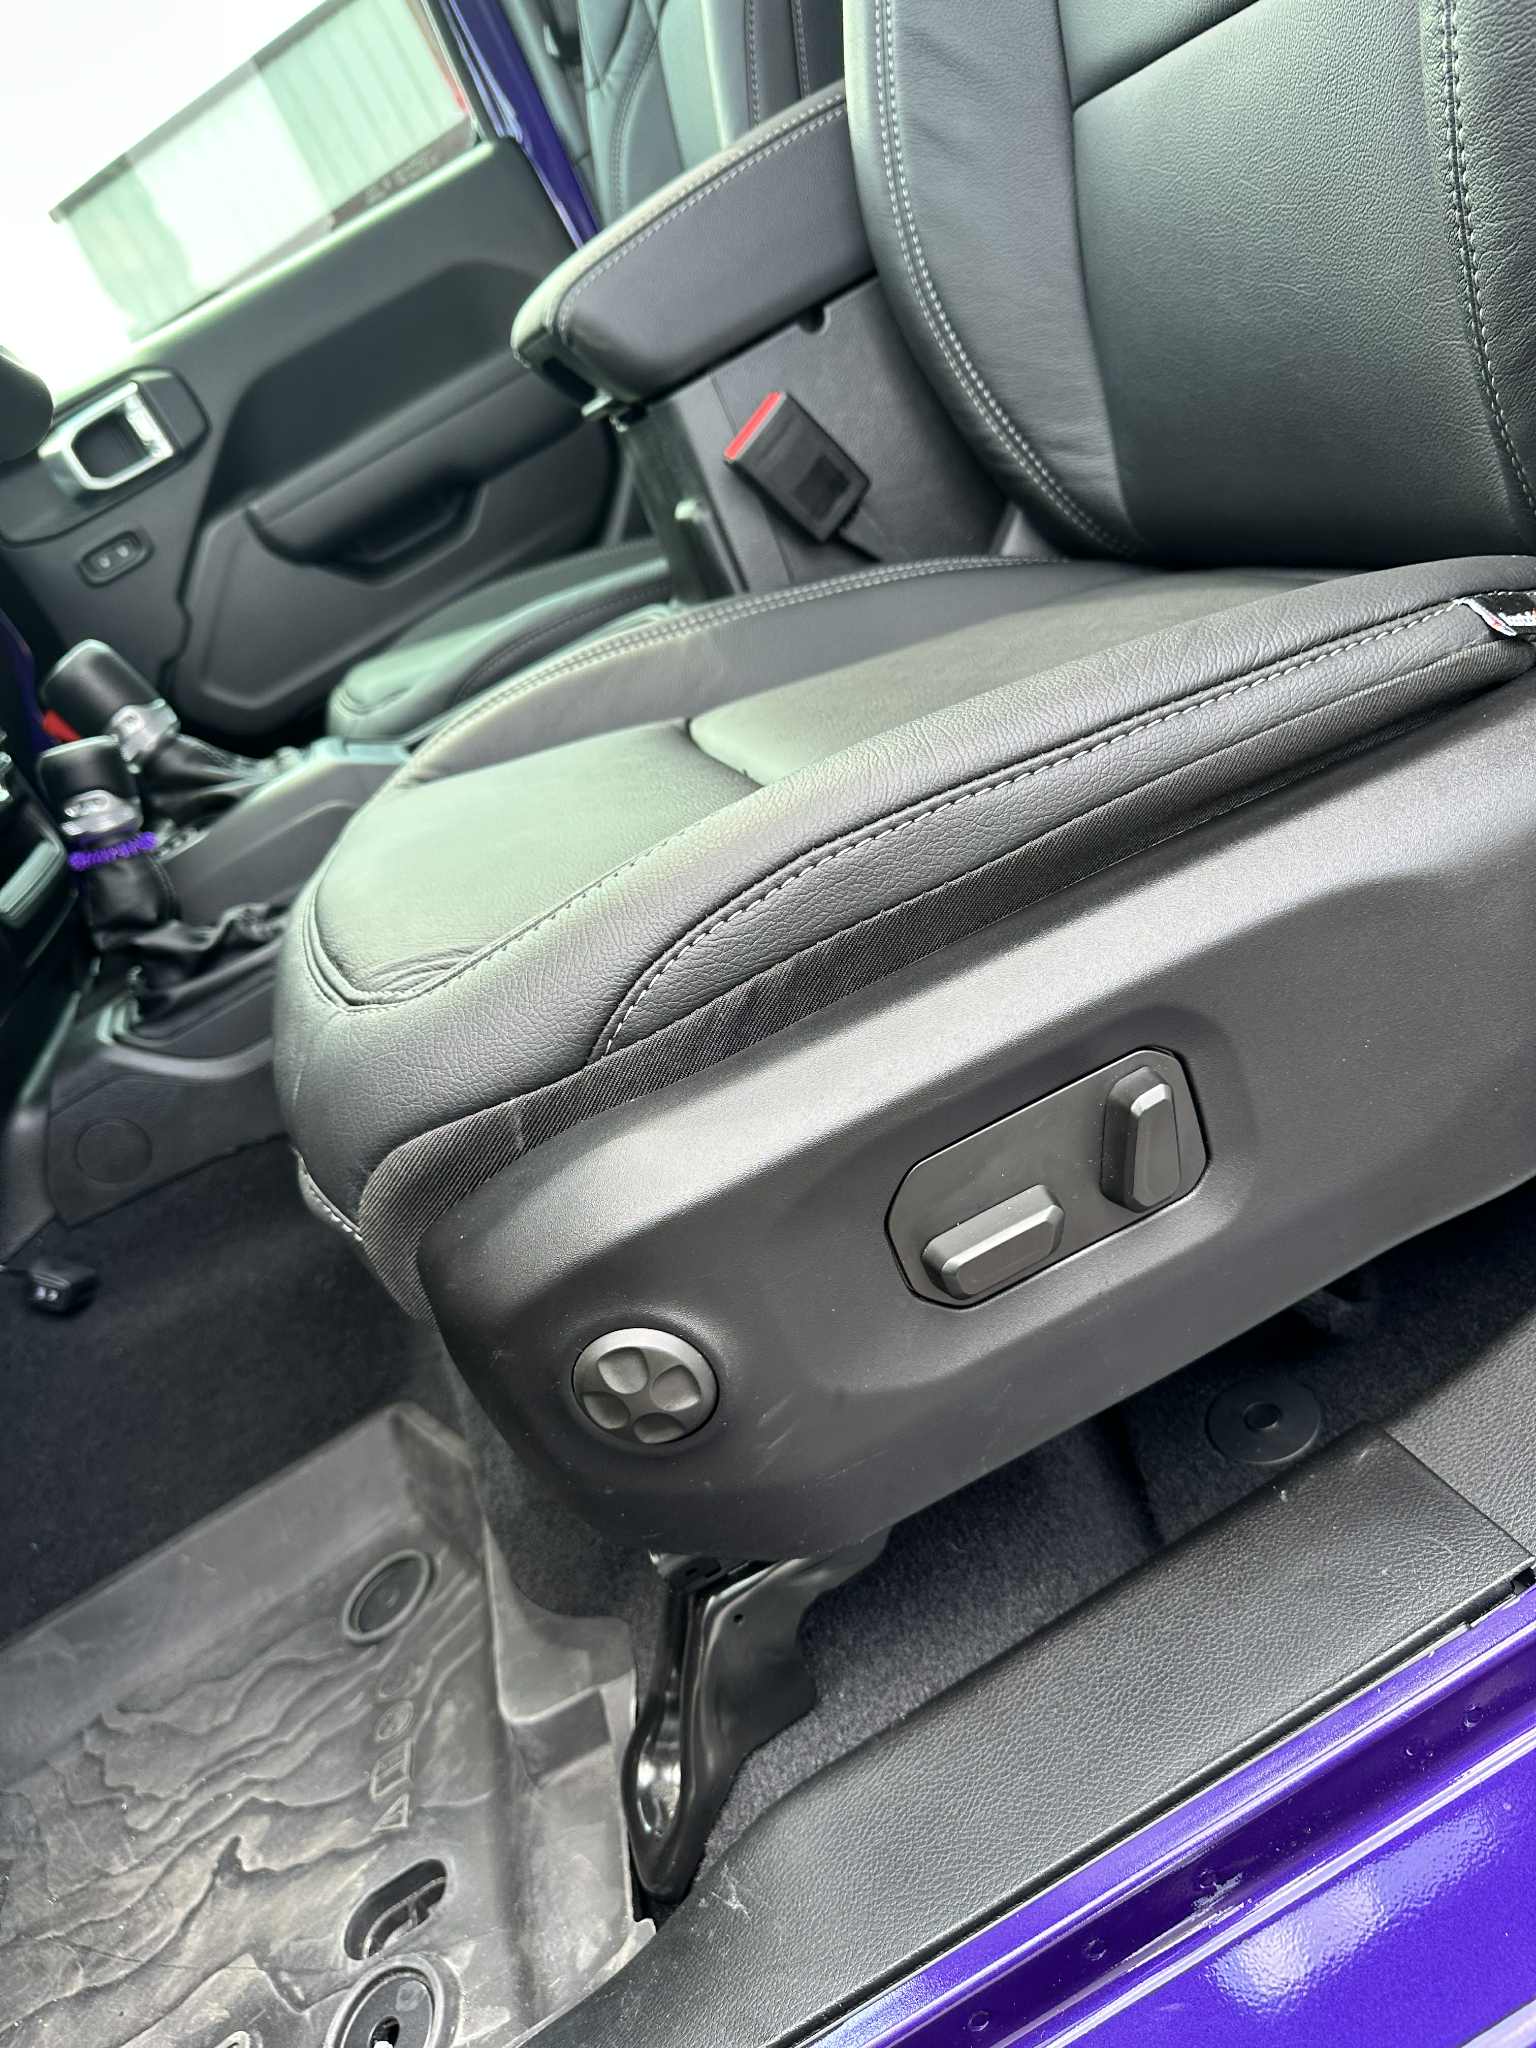
- Isolate the Power Harness: Locate the specific pigtail on the 2024+ seat that feeds the power adjustment switches and the seat base motors.
- Run a Dedicated Circuit: Run a fused, high-quality 12-volt power line and a solid chassis ground directly to this switch harness. Pull this power directly from the battery, through a custom auxiliary fuse block, or via an unused high-amp factory auxiliary switch.
Phase 2: The Code-Free Safety System Swap
To physically connect the seat to the floor and trick your older computer into thinking its original manual seats never left, you must carry over all safety and electrical components from your old seats to your new power seats. If you attempt to splice the 2024+ components into your old harness, your Occupant Restraint Controller (ORC) will immediately trigger an SRS fault, as the modules are "keyed" to the donor vehicle.
Components You MUST Swap (Move from old seats to new power seats):
- Original Seat Wiring Harness: Transferring your original harness ensures the main floor connector physically mates to your vehicle's floor plug and the pinouts remain correct.
- Seat-Mounted Side Impact Airbags: The 2024 side airbags feature different igniter resistance values. Moving your original airbags ensures the resistance matches what your computer expects.
- Female Seatbelt Receptors (Buckles): Moving your original buckles over ensures they plug directly into your original wiring harness.
- Passenger Occupant & Driver Presence Modules: These cushion bladders and switch pads are calibrated to your vehicle's specific ORC. Moving them over prevents you from needing a dealer-level scan tool to recalibrate the system.
- Seat Track Position Sensors: Swap these standalone sensors over to guarantee perfect communication with your existing computers.
Important Safety Note: Always ensure the vehicle's 12V battery is completely disconnected for at least 15–20 minutes before unplugging the yellow SRS connectors to drain residual power and prevent accidental airbag deployment.
Note: When sourcing your donor power seats, verify that the donor vehicle was equipped with the driver presence detection module, as it was not offered on every single trim level. As long as the donor seat supports it, simply swap your factory keyed modules over, bolt the seats in, and plug them up. For swaps where this sensor is missing, de-pin it from the main seat harness and move it into your new seat harness to complete the job.

Installing 2024+ Power Seats in a Manual 2024+ Model JL or JT
If you already own a 2024 or newer JL/JT with manual seats and want to upgrade to factory power seats from another 2024+ donor rig, the process is significantly easier. You are working within the exact same electrical generation, meaning the structural wiring, floor plugs, and airbag crash standards already match.
The Simplified Swap
Because the wiring pinouts and airbags are identical, you do not need to strip the seat down and swap the wiring harness or side airbags over.
However, to avoid SRS fault codes and expensive trips to the dealer for recalibration, you still must swap the components that are "keyed" to your specific vehicle's computer.
Components You MUST Swap:
- Passenger Occupant Classification Module
- Driver Presence Detection Module
Note: When sourcing your donor power seats, verify that the donor vehicle was equipped with the driver presence detection module, as it was not offered on every single trim level. As long as the donor seat supports it, simply swap your factory keyed modules over, bolt the seats in, and plug them up. For swaps where this sensor is missing, de-pin it from the main seat harness and move it into your new seat harness to complete the job.

Appendix: Part Number Reference Guide
If you are sourcing individual components to complete a build, here is the architectural breakdown of the front seat safety systems across the two generations. These numbers are provided as a point-of-reference, you must confirm your exact part numbers via your VIN and Donor VIN at the dealership.
2018 - 2023 Part Number Guide
| Component Name | Position | Mopar Part Number | Notes |
|---|---|---|---|
| Passenger Occupant Classification Module | Passenger Front | 68617510AA |
Full bladder/module kit. |
| Driver Presence Detection Module | Driver Front | 68617517AA |
Switch pad/module kit. |
| Seat-Mounted Side Impact Airbag | Driver Front | 68280931AC |
First-generation thorax bag. |
| Seat-Mounted Side Impact Airbag | Passenger Front | 68280930AC |
First-generation thorax bag. |
| Driver Seatbelt Buckle Assembly | Driver Front Inner | 6AC53TX7AC |
Standard pigtail routing. |
| Passenger Seatbelt Buckle Assembly | Passenger Front Inner | 6MN82TX7AB |
Includes OCS confirmation wiring. |
| Seat Track Position Sensor | Driver & Passenger | 68605049AA |
Standalone, replaceable SRS component. |
| Base Model Seat Wiring Harness | Driver Front | 68310653AE |
Manual track, non-heated routing. |
2024+ Part Number Guide
| Component Name | Position | Mopar Part Number | Notes |
|---|---|---|---|
| Passenger Occupant Classification Module | Passenger Front | 68617510AA |
Carryover from Launch Architecture. |
| Driver Presence Detection Module | Driver Front | 68617517AA |
Carryover from Launch Architecture. |
| Seat-Mounted Side Impact Airbag | Driver Front | 68569341AA |
Redesigned for updated crash standards. |
| Seat-Mounted Side Impact Airbag | Passenger Front | 68569340AA |
Redesigned for updated crash standards. |
| Driver Seatbelt Buckle Assembly | Driver Front Inner | 7CC87TX7AB |
Updated wiring pigtail for new floor harness. |
| Passenger Seatbelt Buckle Assembly | Passenger Front Inner | Varies by trim | Updated wiring pigtail for new floor harness. |
| Seat Track Position Sensor | Driver & Passenger | 68605049AA |
Carryover from Launch Architecture. |
| Base Model Seat Wiring Harness | Driver Front | Varies by trim | Heavily fragmented due to power seat additions. |


Jeep Interior Upgrades & Seat Swaps
2018+ Jeep Wrangler & Gladiator Power Seat Conversion Guide

2018+ Jeep Wrangler & Gladiator Power Seat Conversion Guide
2018+ Jeep Wrangler & Gladiator Power Seat Conversion Guide
JT Gladiator Seat Swap & Upgrade Guide

JT Gladiator Seat Swap & Upgrade Guide
JT Gladiator Seat Swap & Upgrade Guide
JL Wrangler Seat Swap & Upgrade Guide
